Approved content
The content below is provided by a partner.
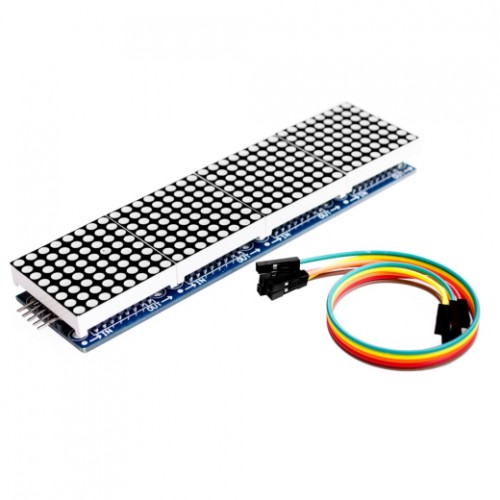
This extension works with single or multiple MAX7219 8x8 LED matrix display modules.
To import this extension, go to Advanced -> +extension and enter “MAX7219” in the search box, or copy/paste https://github.com/alankrantas/pxt-MAX7219_8x8. Press enter and click the extension.


For the module at the head of the chain, connect it to micro:bit as follows:
MISO or MI (default P14) is not used, but included anyway for SPI pins are reassigned together.
Of course, you can reassign these SPI pins in anyway you want; just use the setup block and remember to set the correct number of matrixs.

The rest of the modules (if any) are connected as follows:

It’s basicly the same as the first one, except all module’s DIN connects to DOUT on the previous one. Be noted that in the wiring picture above the order of the pins are slightly different (for example, CS and CLK) from the module I used.
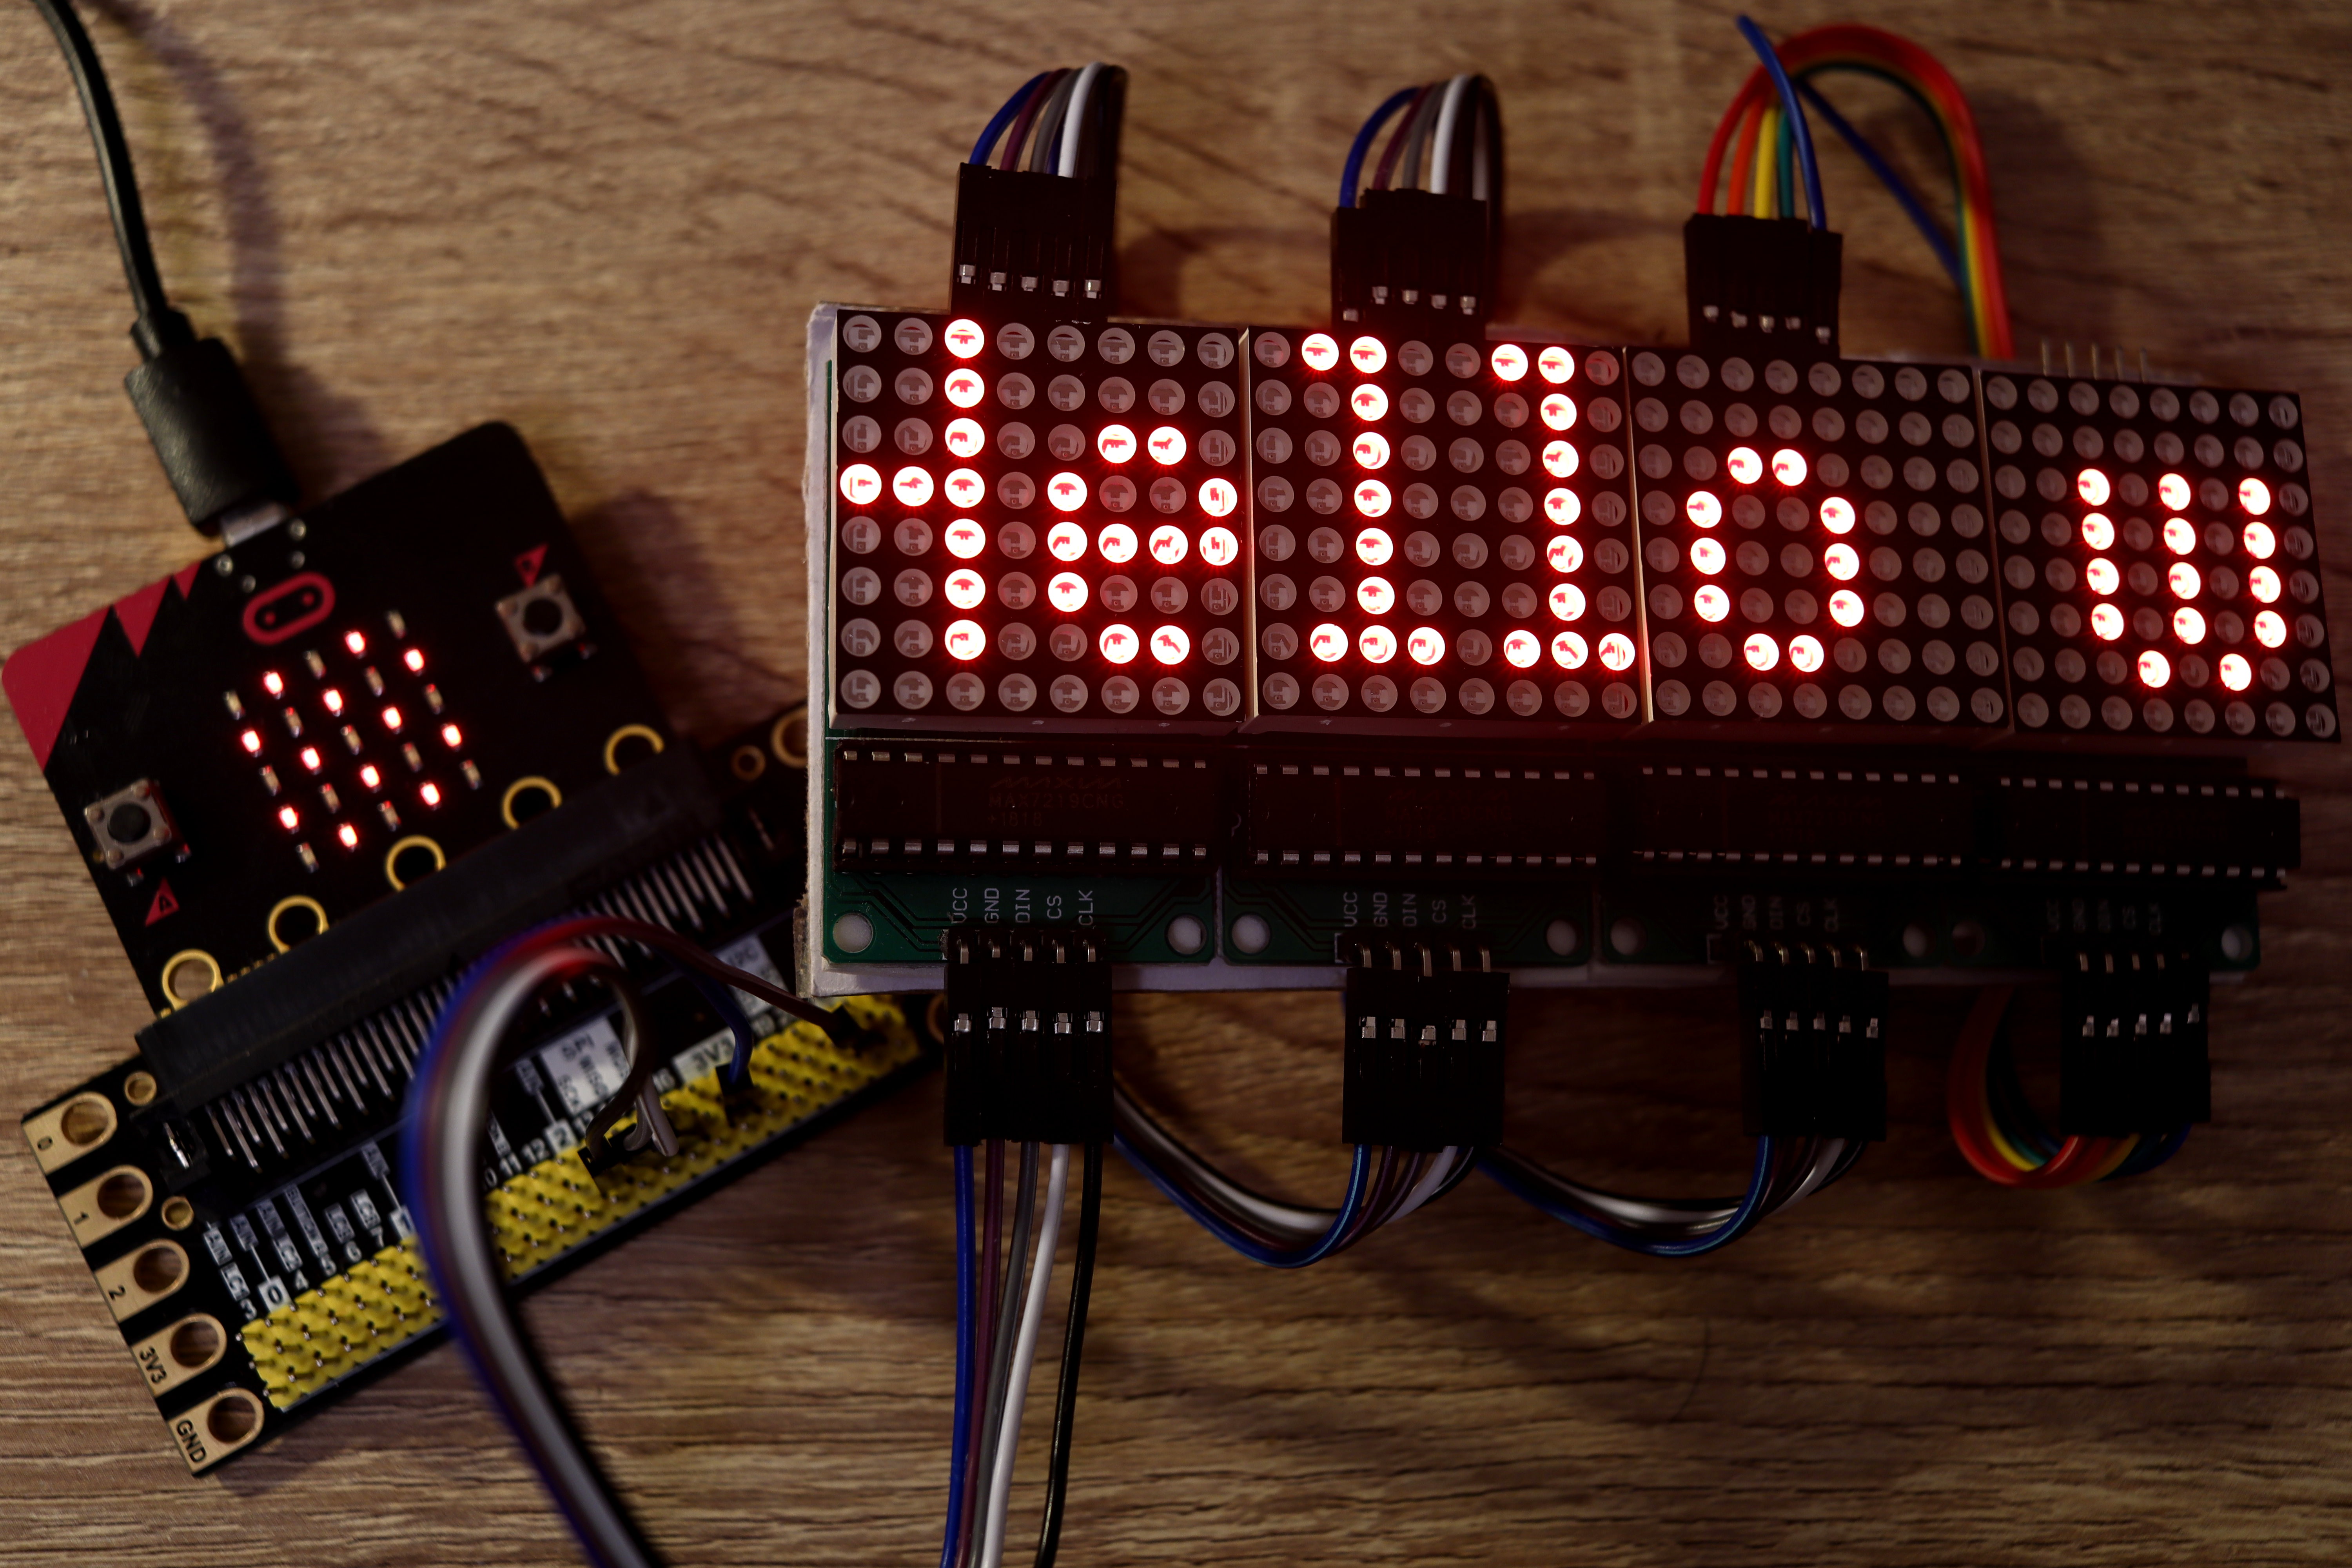
In my test the 3.3V power from micro:bit itself (90mA) is sufficient to power 4 chained MAX7219 modules. You may need more for a longer matrix chain.
This extension assumes that you arrange single MAX7219 modules as a “chain”, that they linked into a larger horizonal LED display.
For linked individual matrix modules, the one directly connected to micro:bit has the highest index number (total number - 1), and the furthest one (far right) has index of 0. You can use the index number to print something onto a specific module.

Some people use the 4-in-1 MAX7219 modules, which are 4 matrixs already linked together, but wired in different directions and/or order.
You can choose to rotate and reverse the display by using the following block in the advanced section:

Warning: the extra rotation/reverse calculating process slow down the text scrolling/refreshing speed. You may have to reduce the scrolling delay time to 0.
There are currently two built-in display modes; first is the simple text printing mode, which use the whole LED display to show or scroll a string.
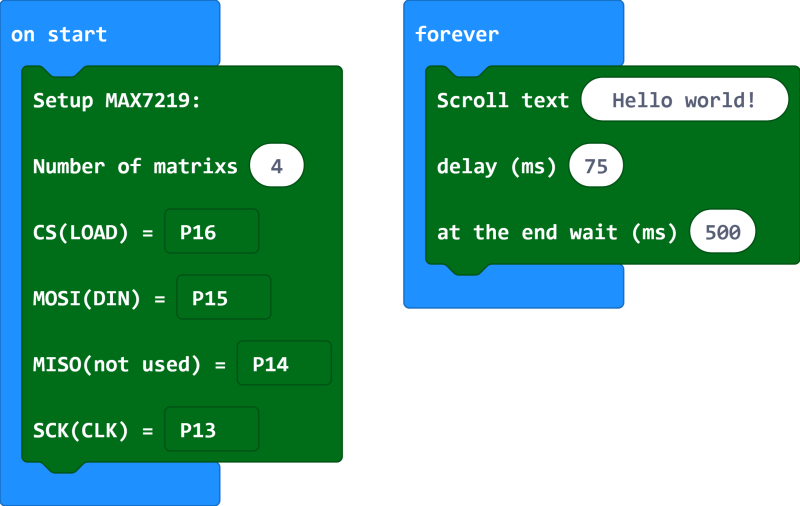
MAX7219_Matrix.setup(
4,
DigitalPin.P16,
DigitalPin.P15,
DigitalPin.P14,
DigitalPin.P13
)
basic.forever(function () {
    MAX7219_Matrix.scrollText(
    "Hello world!",
    75,
    500
    )
})
The scrolling text block shows the whole sentence by scrolling it from right to left, speed adjustable. However, the program will not contiune to do anything until scrolling is finished.
Be noted that if you put in a very very long string, the micro:bit may run out of memory and show the error code of 20.
Next, the display text block prints words on the LED display without (perceivable) delays, and you can choose offset (the starting point along the LED display, from -8 to the end of line). This is more sutiable for very short texts or characters, and you can print them seperatly along the LED display. (You will have to set the clear screen option to false.)
You can also print a custom character or image on the LED display. Use this 8x8 LED generator (right side is “up”) and copy the byte array as input string. Paste the text in the block you find in “more” section; it would transform the text into a number array which can be used to print special characters.


let ChstomChr: number[] = []
MAX7219_Matrix.setup(
4,
DigitalPin.P16,
DigitalPin.P15,
DigitalPin.P14,
DigitalPin.P13
)
ChstomChr = MAX7219_Matrix.getCustomCharacterArray(
"B00100000,B01000000,B10000110,B10000000,B10000000,B10000110,B01000000,B00100000"
)
MAX7219_Matrix.displayCustomCharacter(
ChstomChr,
0,
true
)
So far the extension only contains a simple ASCII character library. If you input a character that’s not in the library, it will not be displayed (skipped) anyway. However, you can add custom character or images into the library by using some unusual Unicode characters as index/tokens.
There’s a block that displays all the characters in the library.
The second mode allows you to get/modify a 8x8 number array variable and use it to directly set any or all of the modules.
Due to the nature of the control method of MAX7219s, it is actually harder to toggle a single LED on the 8x8 matrix. (They set one whole column at a time.) So is this mode you’ll have to keep track the status of all LEDs by youself. The example below will show a anti-slash line on module 1 (second from the right).

let matrix: number[][] = []
MAX7219_Matrix.setup(
4,
DigitalPin.P16,
DigitalPin.P15,
DigitalPin.P14,
DigitalPin.P13
)
matrix = MAX7219_Matrix.getEmptyMatrix()
for (let index = 0; index <= 4; index++) {
    MAX7219_Matrix.setValueInMatrix(
    matrix,
    index,
    index,
    1
    )
}
MAX7219_Matrix.displayLEDsForOne(
matrix,
1
)
It would also be easier if you modify the 8x8 array variable in JavaScript mode.
If you use Bluetooth extension along with this extension, you would get error code 20 (out of memory) on your micro:bit. It’s probably because the BLuetooth extension use a lot of memory and there’s not enough RAM to run both.
MIT
max7219_8x8=github:alankrantas/pxt-max7219_8x8#v0.0.3